Installing Ubuntu 22.10 on the Raspberry PI 4
In this tutorial, we walk through how to download, image, and install Ubuntu 22.10 on the Raspberry Pi 4!
This weekend I started my winter project: burning my home lab to the ground and starting from scratch. To do this I want a small machine that I can utilize as a jump box that will have physical connectivity to the network and console access for configuring switches etc. I choose Ubuntu for this build because it is the operating system that I am most familiar with and it arguably has the best support when it comes to *Nix distros. Let's get started installing Ubuntu on the Raspberry Pi 4.

Downloading the Image
To get started, head over to the download page for the Raspberry Pi Ubuntu images and choose the one that you want to download. I like cutting edge so I went with version 22.10 which just came out last month. If you want something a little more long-term, feel free to download the other versions that are available.
Link: https://ubuntu.com/download/raspberry-pi Make sure that you take note of where the Ubuntu image downloads because we will need it later.

Image SD Card
If this is your first foray with the Raspberry Pi, it's important to understand how you install different software on the devices. With a PC, you would plug in a USB drive or put a disk in the optical drive and install the software on your hard disk drive. Raspberry Pi’s are a little different in that you need to image your SD card before you put it into the device. To do this you need to have a card reader for the micro SD card. I like this one because it is small and compact and also works as a smart card reader https://amzn.to/3X62qyQ. You will also need a micro SD card. I use the EVO cards from Samsung and I have been pretty happy with them: https://amzn.to/3O8gBzr.
The final piece to the puzzle is software to image your shiny new SD card. For this we use Balena etcher. Balena etcher is a free piece of software that makes Raspberry Pi deployment super easy! You can download the software here, https://www.balena.io/etcher/. Once you have the software downloaded, go ahead and open it.
You should see a screen like this:

The first thing we will do is click on the button that says “Flash from file” and navigate to where we downloaded our Ubuntu image. Now we will plug in our card reader with the Micro SD card plugged in. Now we will click the “Select target” option. You should see your media device show up.

Now that everything is selected the last thing to do is click “Flash!”
After a few minutes, you should see the software complete and you should get a notification that the flash has been completed!

Now that we have our memory card setup, we can plug it into our Raspberry Pi.

Ubuntu Setup
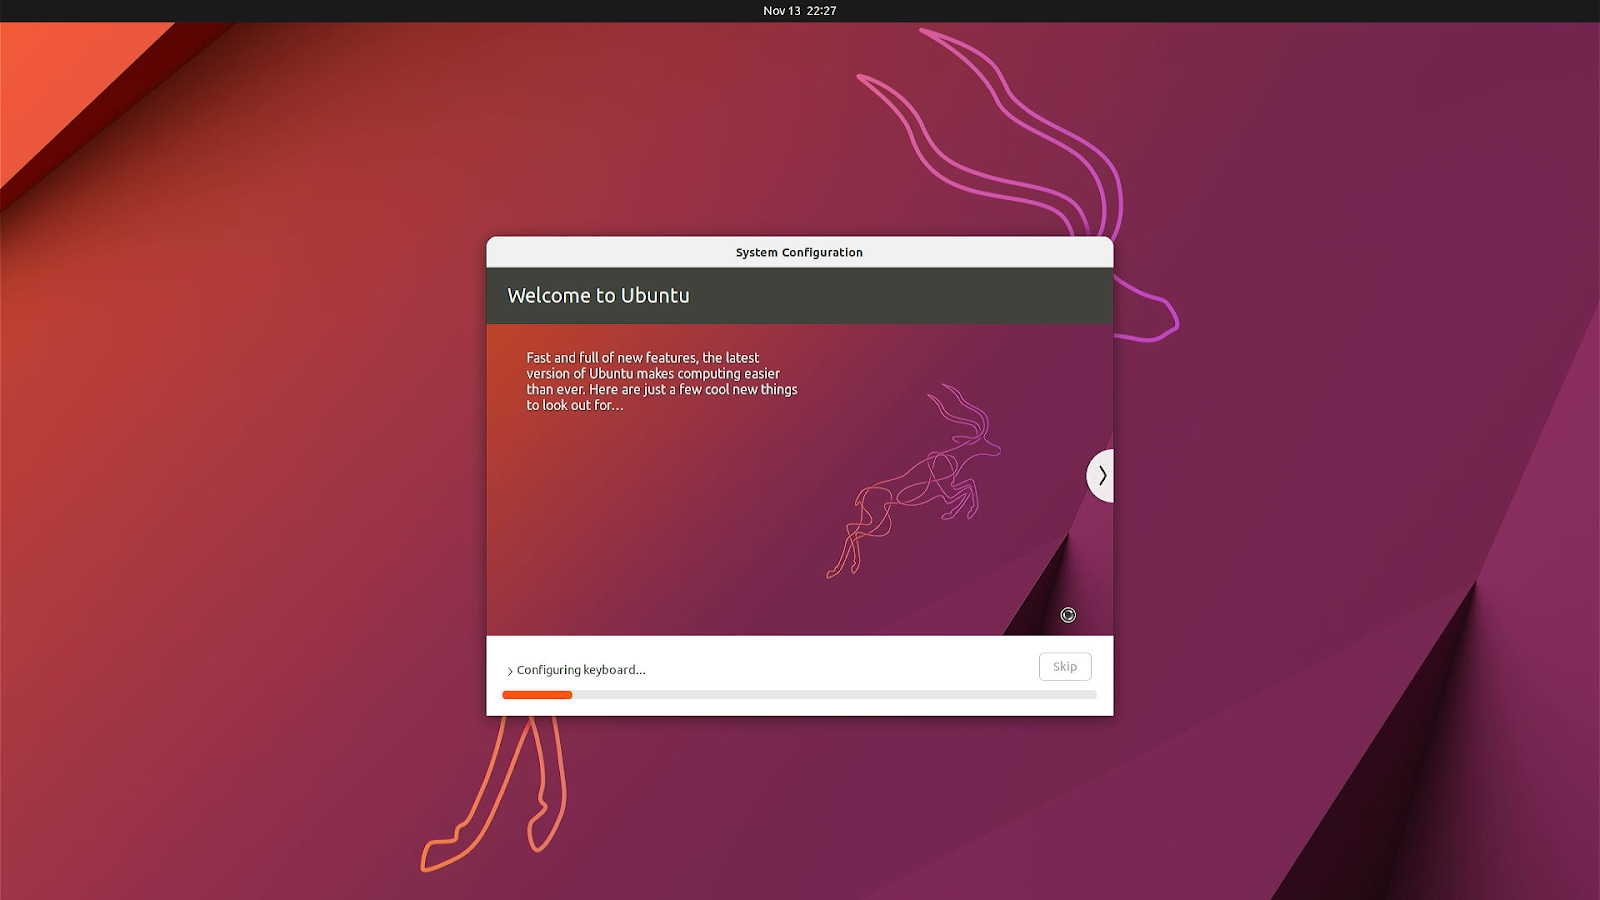
Now let's power on our Raspberry Pi to make sure that our image works. If all went well, you should see a screen like this:

Select the proper language and click continue. On the next screen select the proper Keyboard.

On the next screen, you will be able to choose your wireless network. You can connect the device now or select the option to connect it at a different time. Make your choice and click continue.

On the next screen choose the proper location to set your timezone.

Now let's set up our first user. This will be the user that will have root level (god mode) access so make sure that you set a strong password. After you fill out everything on the page, you will be able to select Continue.

That is the last screen that we need to fill out before the Ubuntu starts to install. Now sit back and relax as Ubuntu completes the installation.
Ubuntu Configuration
Once the installation completes you should see a login screen with your newly created user. Click on the username and enter your password on the screen.

Now that you are logged in, let’s make sure that Ubuntu is up to date and that we remove any unneeded binaries. We do this by opening up the terminal. Click on the square of squares at the bottom left of the screen and type “Terminal” into the search bar. Once the terminal loads, we will be able to run the following command.
sudo apt update && sudo apt upgrade -y && sudo apt dist-upgrade -y && sudo apt autoremove

Note: You may see a notification that the computer needs to restart, after all of the updates are complete, restart your machine and start enjoying Ubuntu!
If you have any issues, please feel free to leave a message in the comments below or shoot me an email!
